I AM CHOIR · Manual
Screen 1: Importing Audio
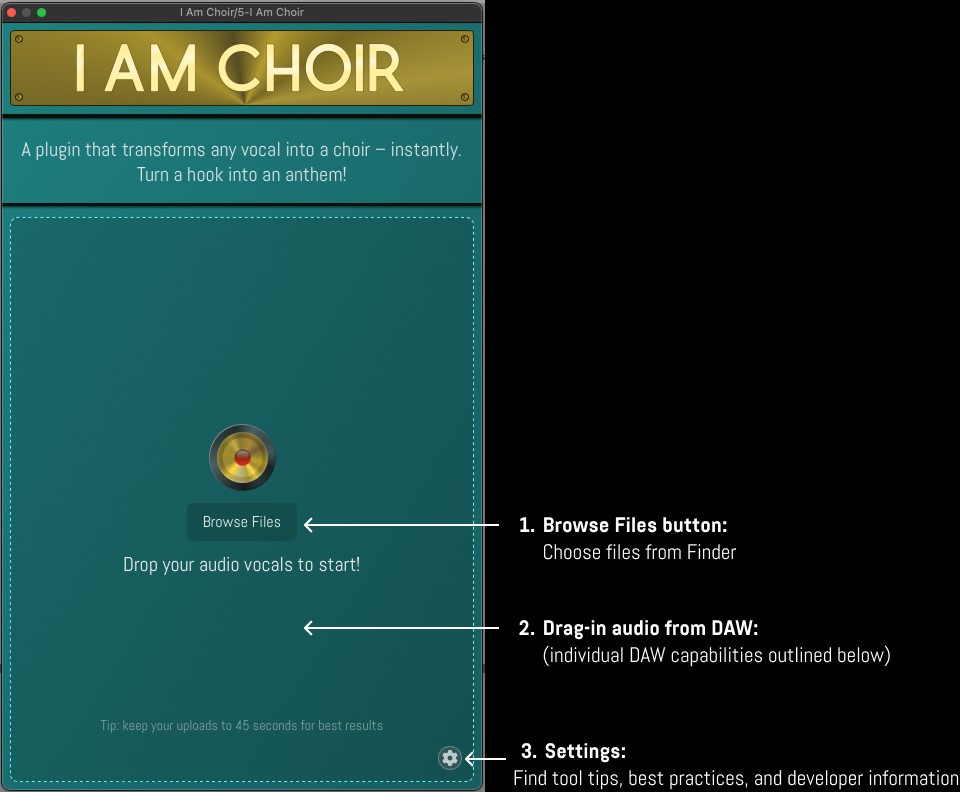
Browse Files button
Click “Browse Files” to open up your Finder, navigate to the audio file you want to process, select it, and double-click or hit enter to load audio into I AM CHOIR. This works in every DAW.
Drag-In audio from DAW
Drag audio within the dotted line to load audio into the choir (not compatible with Cubase or Pro Tools)
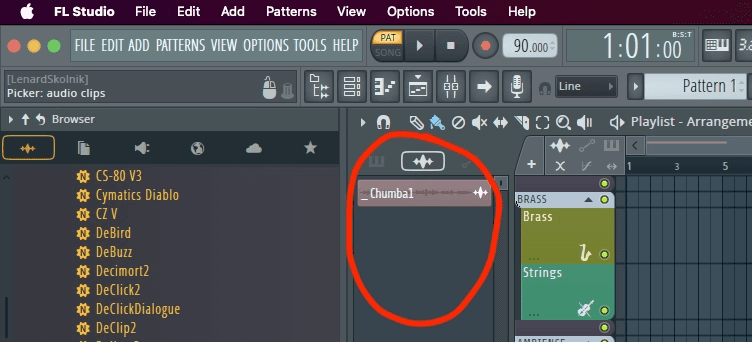
FL Studio users must drag audio from the Audio Clip Tab in the Picker Panel shown here
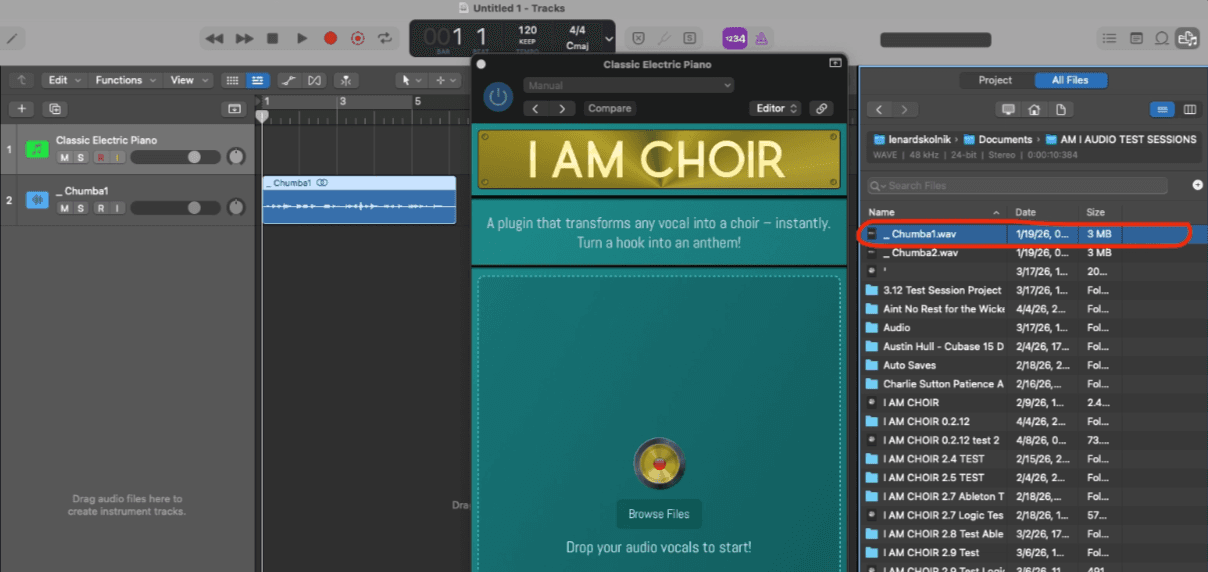
Logic 11.2.2 and later must drag from the All Files Tab shown here
Settings
Access user settings
Temp file storage
About section
Tips
Screen 2: Crafting Your Choir Sound
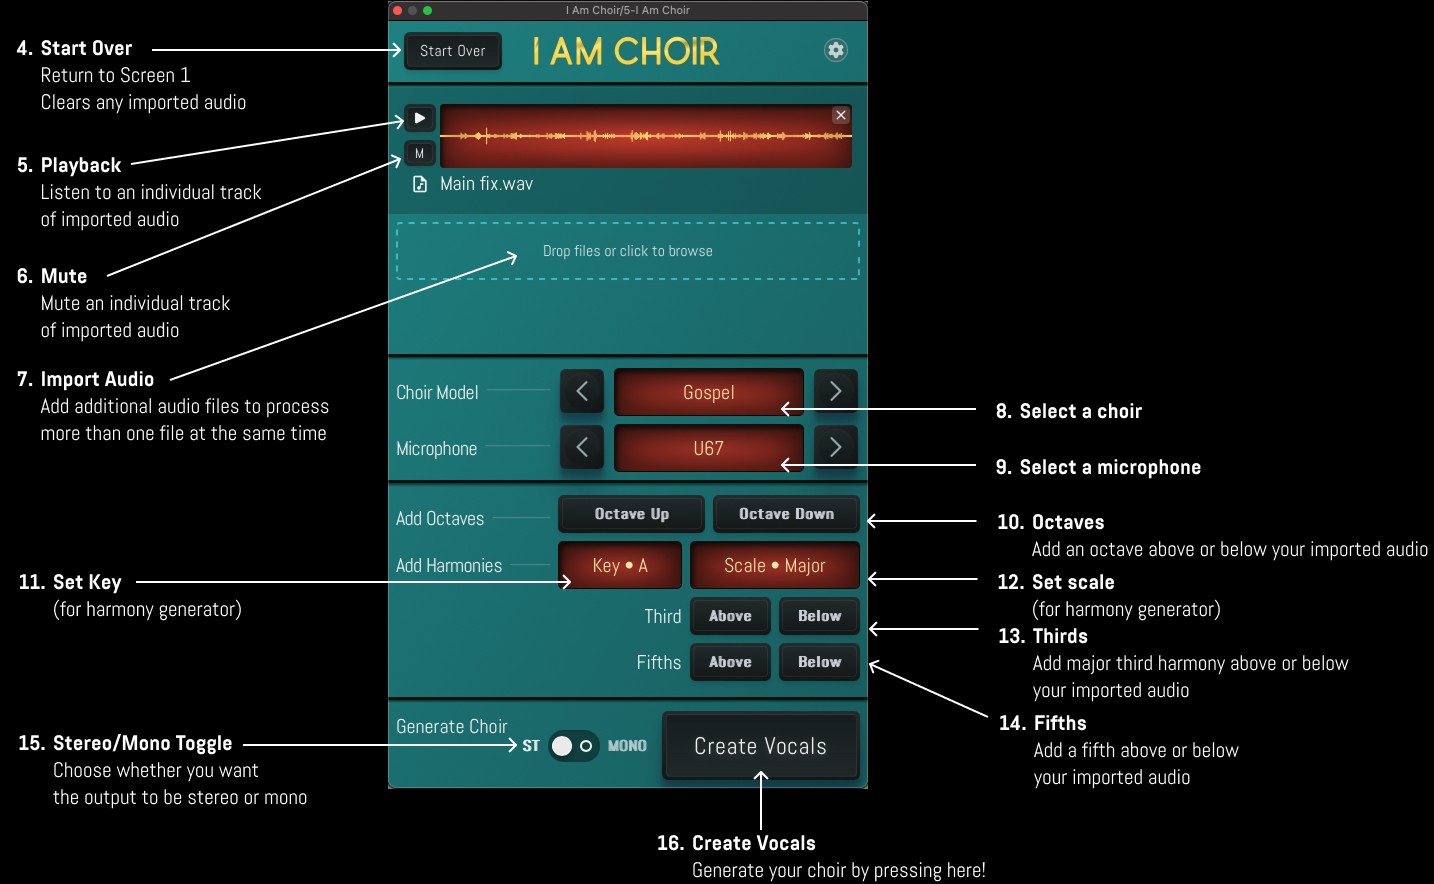
Start Over returns you to screen 1 and clears imported audio
Playback on screen 2 allow you to listen to imported audio
Mute individual files during playback
Import Audio to process more than one file at a time by
Dragging audio within the perforated line or
Clicking within the perforated line to browse from your Finder
Select a choir from a drop-down or use the arrows to cycle through choir models
Select a microphone from a drop-down or use the arrows to cycle through microphone models
Octaves can be generated by selecting the “Octave Up” or “Octave Down” buttons to generated a choir singing the octave above or below your imported audio
Set the key for the harmony generator, be sure to match your imported audio
This setting will have no effect unless you generate harmonies
Set the scale for the harmony generator
13 +14. Click on the “Above” buttons to generate a choir singing a third or fifth above your imported vocal. The “Below” buttons generate a choir singing an octave down from each harmony.
Stereo/Mono Toggle
Create Vocals generates your choir and takes you to the next screen
Screen 3: Reviewing, Processing & Exporting Choir Outputs
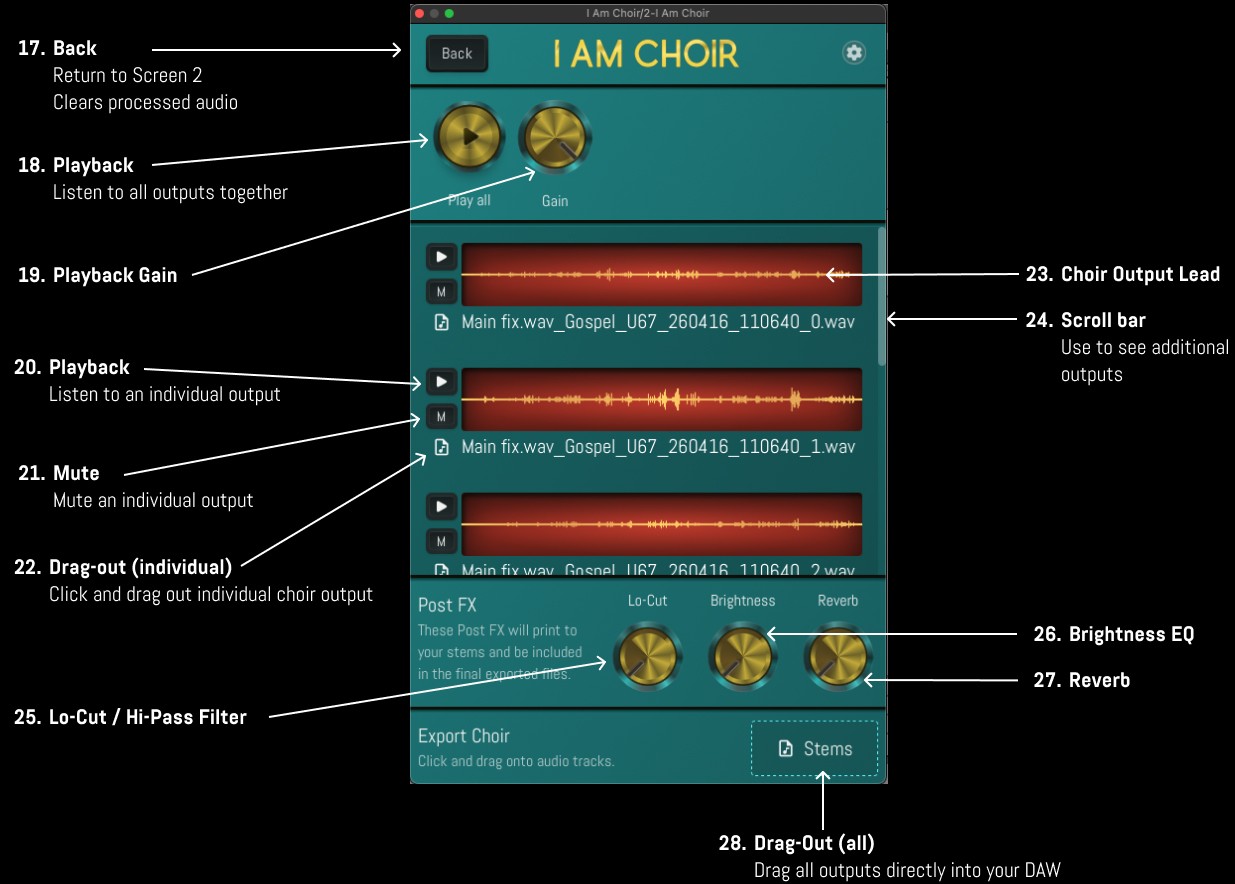
Back button returns you to screen 2 and clears the generator choir outputs
Playback will audition all generator choir outputs together
Playback Gain adjusts the playback volume
Small play buttons will audition individual choir outputs
Mute individual choir outputs from playback
Drag-Out individual choir outputs by clicking on the file icon below the Mute buttons
The yellow waveforms represent the individual choir outputs. Each output gets its own “track” in the editor
Use the scroll bar on the righthand side to view choir outputs hidden from view
Use the Lo-Cut knob to remove low end
Use the brightness knob to add brightness
Use the reverb knob to add reverb
Click on “Stems” or file icon on the bottom and drag all your choir outputs directly onto audio tracks in your DAW